
>>

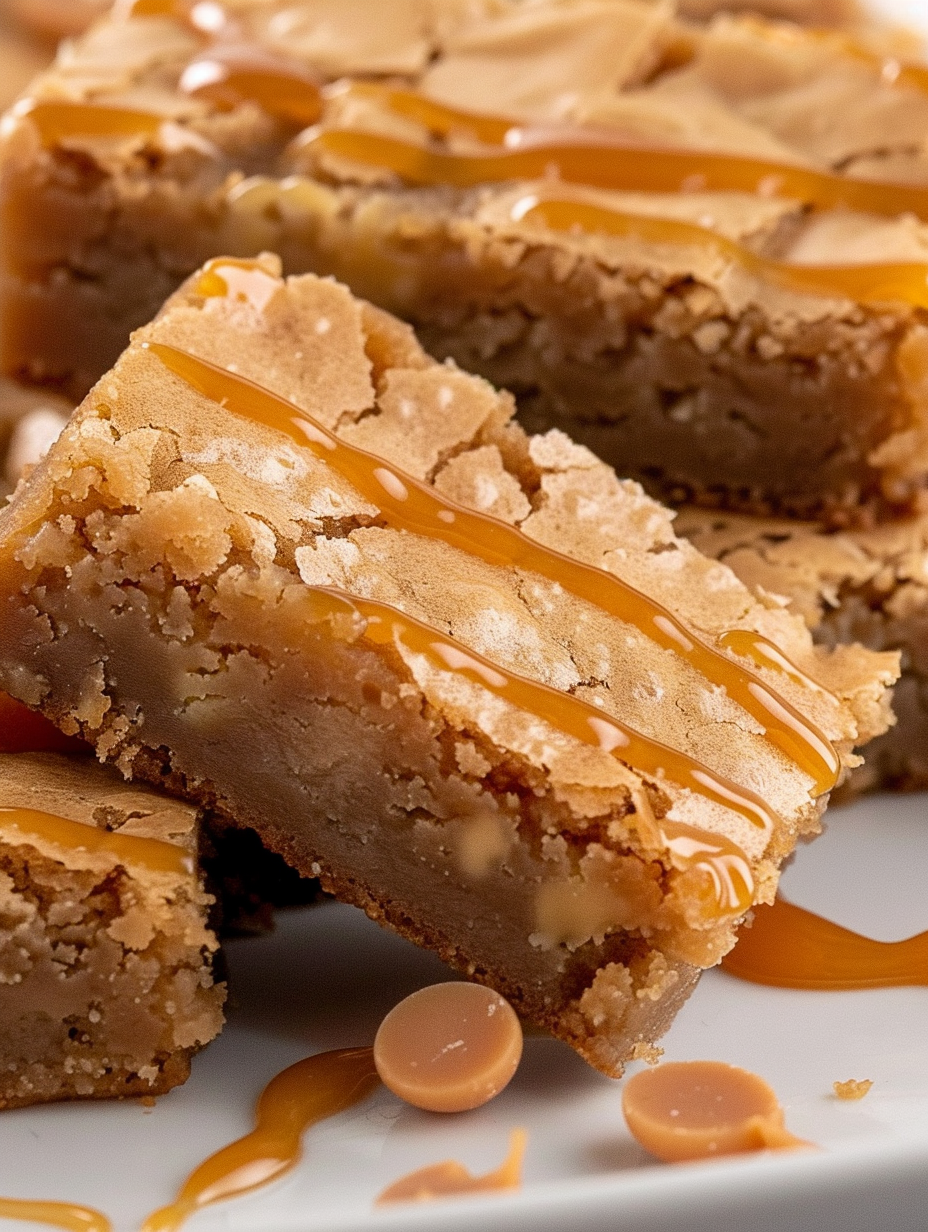
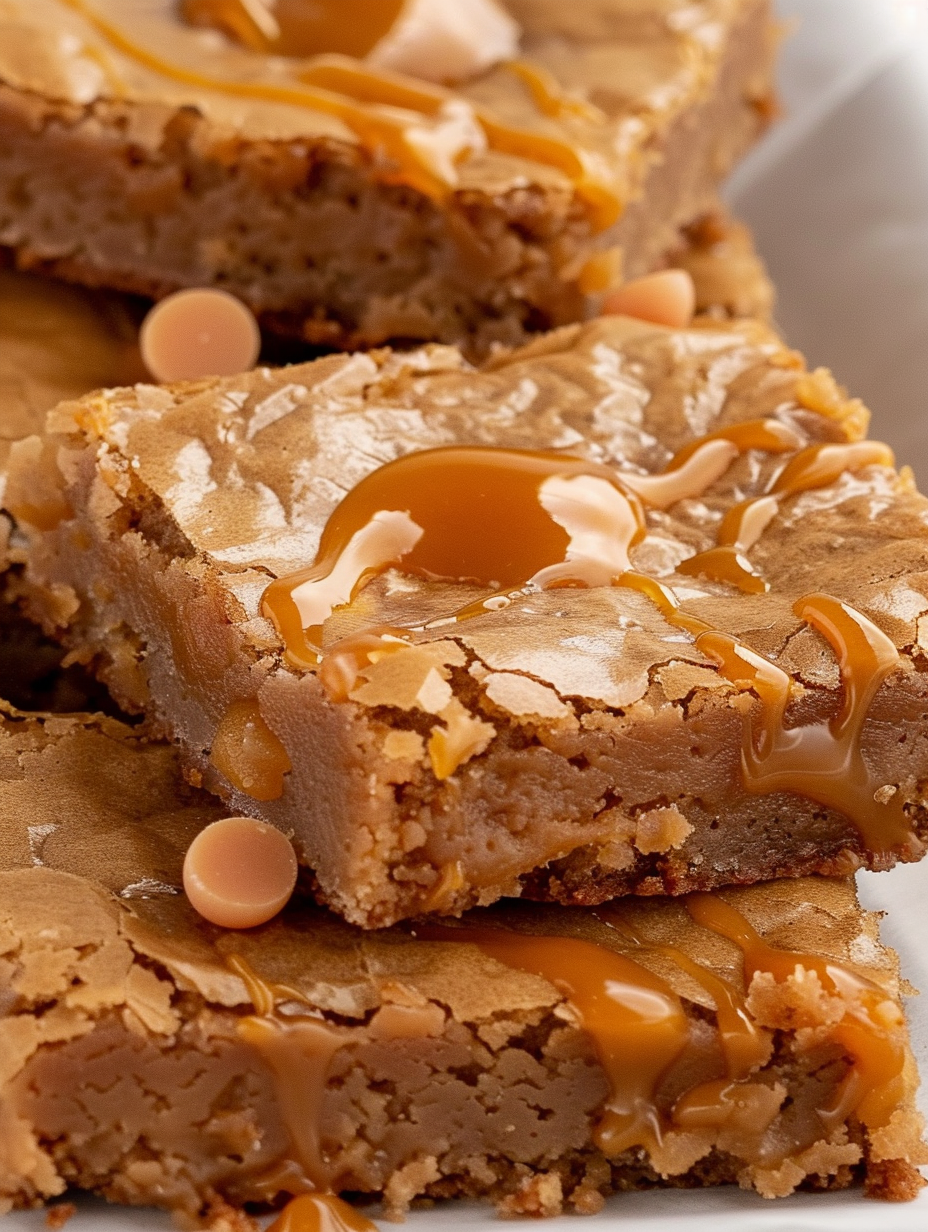
Indulge in chewy, caramel-kissed squares: butterscotch brownies with a shiny crackled top and pockets of butterscotch crunch—perfect for bake sales, holidays, or everyday treats.

This recipe for butterscotch brownies has been a staple on my counter during the cozier months and a surprise hit at summer potlucks. I first combined brown sugar and melted butter in a sleepy Sunday afternoon experiment, folding in a handful of butterscotch chips that had been languishing in the pantry. The result was an immediately addictive bake: a fudgy yet slightly cakey crumb, a glossy, cracked top and those little molten pockets of caramel flavor that keep you reaching for one more square. Since that first attempt, these squares have found their way into lunchboxes, office celebrations and the occasional late-night baking therapy session.
What I love most about this variation is how straightforward it is: minimal ingredients, simple technique and dependable results every time. The brown sugar gives a deep caramel note that pairs beautifully with the sweet, toffee-like butterscotch chips. The texture lands between a soft bar cookie and a dense brownie, making them easy to portion and pair with coffee or a scoop of vanilla. These are the kind of sweets I make when I want something comforting without fuss, and they always disappear fast.
My family’s reaction has always been honest and immediate: ask for another and offer to take the last piece. I often double the batch for holidays because they travel well and keep their texture when stacked. Over time I learned to trust visual cues—the glossy, slightly cracked top and a toothpick with a few moist crumbs—over a strict timer, which guarantees the right chewiness every bake.
One of my favorite aspects of these bars is how they evolve after chilling. The flavors meld and the texture firms slightly, which makes them perfect for packing in lunchboxes. I served these at a neighborhood bake sale once and sold out within an hour—people loved the butterscotch twist and the sing-song crumb that’s both tender and substantial. They are a dependable, crowd-pleasing option for nearly any occasion.
Store cooled squares in an airtight container at room temperature for up to three days. If you plan to keep them longer, refrigerate for up to seven days; bring to room temperature before serving for best texture. To freeze, wrap individual squares in plastic wrap and place in a freezer-safe container for up to three months. Thaw at room temperature or warm briefly in a low oven at 300 degrees Fahrenheit to revive the glossy top and soften the center. Avoid storing under direct sunlight or near heat sources to prevent blooming of the butterscotch chips.
If you need to adjust the recipe, use dark brown sugar for a deeper molasses note or substitute half the all-purpose flour with whole wheat pastry flour for a nuttier flavor and slightly denser texture. For a dairy-free version, replace the butter with a vegan stick butter at a 1 to 1 ratio and choose dairy-free butterscotch-style chips; keep in mind texture will differ slightly. You can swap butterscotch chips for toffee bits or chopped caramel candies, though these may create a stickier bite.
Serve warm with a small scoop of vanilla ice cream or a drizzle of salted caramel for an indulgent dessert. For a party platter, dust lightly with powdered sugar and garnish with flaky sea salt to balance the sweetness. These squares pair well with robust coffee, milk or a late-afternoon black tea. For a brunch twist, cube them and serve alongside fruit and savory bites for a sweet contrast.
Butterscotch itself is an old confection rooted in British candy-making, originally made from brown sugar and butter slowly cooked until it caramelized. Over time the flavor found its way into American home baking, often as chips or flavored syrups, producing treats like these squares that emphasize the buttery, toffee-like taste. This recipe is an example of how traditional candy flavors adapt into simple American-style baked goods that prioritize ease and crowd appeal.
In autumn, fold in 1/2 teaspoon ground cinnamon and top with pecans for a cozy, spiced version. For the holidays, mix in 1/2 cup chopped dried cranberries and candied orange peel to add brightness that cuts through the sweetness. During summer, serve chilled with a citrusy whipped cream to balance richness. Small tweaks like adding a pinch of fleur de sel on top create festive variations for any season.
To prepare ahead, bake the bars and let them cool completely, then slice and layer between parchment in a shallow rigid container. These keep well for up to five days refrigerated and are easy to portion for grab-and-go snacks. For freezer-friendly individual portions, wrap each square tightly in plastic, then foil. Label and date the package for easy rotation. Reheat briefly in the microwave on low power for a freshly baked feel.
These butterscotch squares are a joy to make and share. They are forgiving, adaptable and delicious enough to become a new favorite. Whether you keep a batch for the family or bring them to someone else’s table, they carry a warm, caramel comfort that feels like home.
For the glossiest top, make sure the butter and sugar are well combined so the sugar begins to melt before adding eggs.
Check for doneness by inserting a toothpick; remove when it has moist crumbs rather than wet batter to retain a fudgy center.
Warm your knife between cuts (run under hot water, dry) to get clean edges without tearing the crumb.
Let the bars cool completely before removing from the pan; chilling for 30 minutes makes slicing much cleaner.
This nourishing butterscotch brownies recipe is sure to be a staple in your kitchen. Enjoy every moist, high protein slice — it is perfect for breakfast or as a wholesome snack any time.
This Butterscotch Brownies recipe makes perfectly juicy, tender, and flavorful steak every time! Serve with potatoes and a side salad for an unforgettable dinner in under 30 minutes.
Preheat oven to 350 degrees Fahrenheit and line a 9x13-inch pan with parchment paper, leaving an overhang to lift the baked bars easily.
Whisk melted, cooled butter with 2 cups light brown sugar in a large bowl until glossy and smooth to help achieve a shiny top.
Add eggs one at a time, mixing thoroughly after each, then stir in 1 1/2 teaspoons vanilla extract until the mixture is homogenous.
Whisk together 2 cups all-purpose flour, 1 teaspoon baking powder and 1/2 teaspoon salt in a separate bowl to distribute the leavening evenly.
Add half the flour mixture to the wet ingredients, stir until incorporated, then add the remaining half and mix until the batter is thick and smooth.
Fold 1/2 cup butterscotch chips into the batter, scraping the bowl to distribute chips evenly; reserve a few to sprinkle on top if desired.
Spread batter evenly in the prepared pan and bake for 20 to 23 minutes until the top is glossy and slightly cracked; cool completely before slicing into 24 squares.
Last Step: Please leave a rating and comment letting us know how you liked this recipe! This helps our business to thrive and continue providing free, high-quality recipes for you.
Leave a comment & rating below or tag
@silksavor on social media!

Tender baked salmon crowned with a garlicky Parmesan herb crust, bright lemon, and buttery crunch. Simple to make, stunning to serve, and irresistibly flavorful.

Buttery graham crust, silky cheesecake, and cinnamon-kissed apples under a crunchy crumb, finished with glossy caramel. A fall crowd-pleaser you will crave.

Tender green beans in silky mushroom cream, crowned with crispy onions. A comforting holiday side made entirely from scratch that always disappears fast.
Leave a comment & rating below or tag @silksavor on social media!
Enjoyed this recipe? Share it with friends and family, and don't forget to leave a review!
This recipe looks amazing! Can't wait to try it.
Comments are stored locally in your browser. Server comments are displayed alongside your local comments.

Join to receive our email series which contains a round-up of some of our quick and easy family favorite recipes.
