
>>

Quick, buttery thumbprint cookies filled with sweet cherry pie filling and finished with a simple vanilla glaze — perfect for celebrations or everyday treats.

This recipe for Cherry Pie Cookies is one I reached for the moment I wanted a classic cherry pie flavor without the fuss of rolling dough and weaving a lattice. I first made these on an impromptu weekend visit from my sister, when we had plenty of cherries in the pantry but only an hour before a potluck. The result was bright, sweet, and buttery — everyone assumed I spent hours baking when in fact they were ready in under 30 minutes. The texture is tender and slightly cakey at the center with a delicate, crisp edge that melts in your mouth. The burst of cherry filling in the middle brings a familiar, nostalgic note of homemade pie all wrapped into a small, shareable cookie.
These are the kind of treats that travel well. I remember carrying a tin to a summer barbecue where they vanished faster than sheet cake. The cookies are forgiving to make, require basic pantry ingredients, and the cherry pie filling can be swapped for other fruit fillings for seasonal variations. If you like bright, fruit-forward desserts with a buttery base and a touch of glaze for shine, these will quickly become one of your go-to recipes.
I learned how crowd-pleasing this combination is the first time I served them to my neighbors after a long winter — suddenly everyone wanted the recipe. They appreciated the familiar pie flavor in cookie form and the fact that the dough is forgiving. Little touches like pressing the center shallowly and spooning just the right amount of filling make a huge difference in the final texture and crispness.
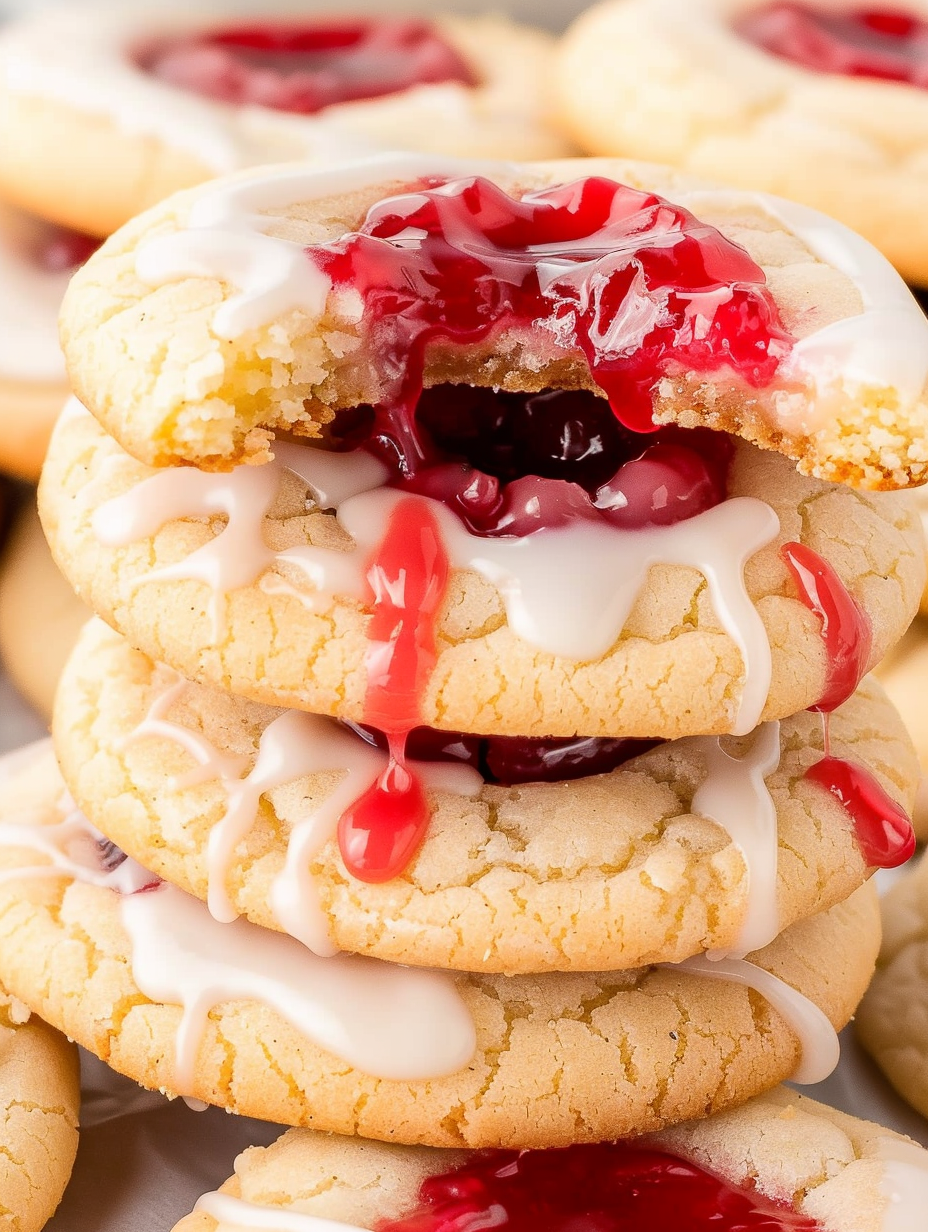
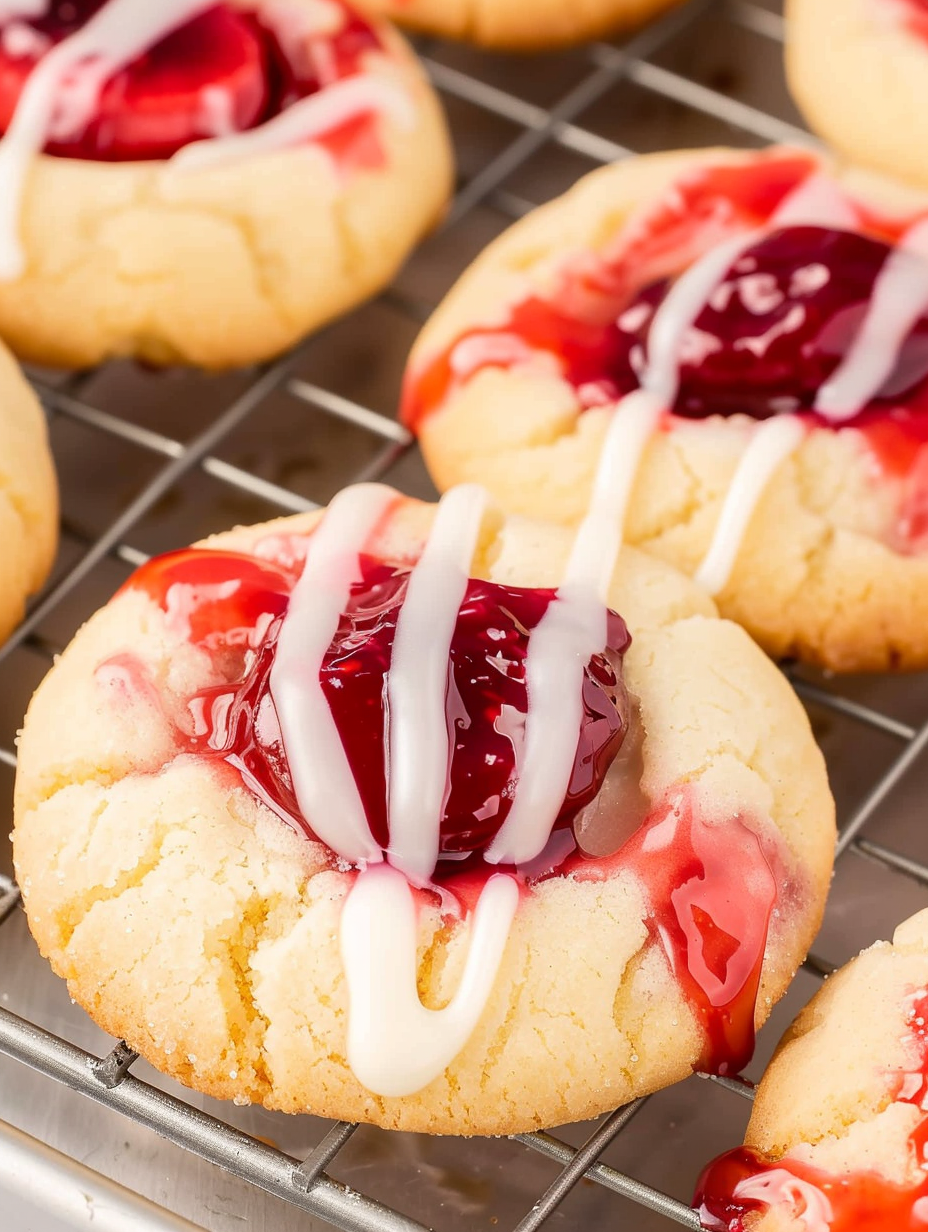
One of my favorite parts of this recipe is watching how the cherry filling sets into the little hollows like miniature pies. Serving them warm with a cup of coffee or cold in a picnic tin has become a ritual — they're always the first to go. Friends often tell me they love that these cookies taste like a slice of cherry pie without the big commitment of serving a whole pie.
Store cooled cookies in an airtight container layered with parchment to prevent sticking. At room temperature they stay fresh for up to 3 days; place them in the refrigerator for up to one week if you prefer a firmer texture. To freeze, arrange cookies on a baking sheet and flash-freeze for 45 minutes, then transfer to a freezer-safe bag or container for up to three months. Thaw at room temperature or warm briefly in a 275 degrees Fahrenheit oven for 5 minutes to refresh texture. If you plan to freeze for long-term storage, omit the glaze until you are ready to serve to prevent condensation from making the surface sticky.
If you need to swap ingredients, here are reliable options: replace all-purpose flour with a 1-to-1 gluten-free blend for gluten-free cookies, or use 1/4 cup almond flour plus 1 1/4 cups all-purpose for a nuttier profile. Substitute the cherry pie filling with other preserves like raspberry, blueberry, or apricot — reduce the filling slightly if using very runny jam. For a dairy-free version, use a vegan stick butter replacement measured 1:1 and an egg replacer such as 1/4 cup unsweetened applesauce plus a pinch of baking soda; note that texture will be slightly softer.
Serve these alongside a scoop of vanilla ice cream for an easy dessert, or present them on a platter with tea sandwiches for afternoon tea. Garnish with a light dusting of powdered sugar or a sprig of mint for color contrast when serving to guests. They pair particularly well with black tea or lightly roasted coffee and are festive on holiday cookie plates mixed with other small bites.
Thumbprint-style cookies are common in many baking traditions and are often filled with jam or preserves. The combination of a short, buttery cookie base and fruit filling evokes the classic American fruit pie, especially when cherry filling is used. This crossover — a cookie that whispers of pie — draws on both European thumbprint origins and American pie-making heritage, celebrating hand-held treats that are ideal for sharing at community gatherings and family holidays.
In summer, swap cherry pie filling for fresh macerated berries mixed with a little cornstarch and sugar, thickened briefly on the stove. For fall and winter, use spiced apple butter or cranberry-orange preserves to give a seasonal twist. Add a pinch of cinnamon and nutmeg to the dough for warmth, or mix a teaspoon of lemon zest into the glaze for a brighter finish during spring months.
For make-ahead convenience, portion the dough into tablespoon scoops, place on a baking sheet, freeze until firm, then transfer to a storage bag. When ready to bake, place frozen scoops on a lined sheet, press centers, add filling, and extend bake time by a couple of minutes. This way you can pull a batch from the freezer and be serving fresh cookies in under 20 minutes. Baked cookies can be pre-glazed and refrigerated for up to 5 days or glazed right before serving for best appearance.
These Cherry Pie Cookies have a way of becoming part of the stories we share: the time I took them to a neighborhood block party, or the rainy afternoon when my kids and I baked them while watching a movie. They are simple, forgiving, and comforting — little bites of cherry pie that make weekday afternoons happier and holiday plates more festive. I hope you enjoy making them as much as I do.
Use room-temperature butter and egg to ensure the dough comes together smoothly and creams properly.
Do not overfill the indentations; about 1/2 to 3/4 teaspoon of filling per cookie keeps the texture balanced.
If duplicating the recipe for a larger crowd, chill shaped dough briefly on the baking sheet before adding filling to prevent spreading.
For crisp edges and a tender center, remove cookies when edges are golden but centers are still slightly soft.
This nourishing cherry pie cookies recipe is sure to be a staple in your kitchen. Enjoy every moist, high protein slice — it is perfect for breakfast or as a wholesome snack any time.
This Cherry Pie Cookies recipe makes perfectly juicy, tender, and flavorful steak every time! Serve with potatoes and a side salad for an unforgettable dinner in under 30 minutes.
Preheat oven to 350 degrees Fahrenheit and line baking sheets with parchment paper. Ensure butter and egg are at room temperature.
Beat softened butter and granulated sugar until light and fluffy, about 2 to 3 minutes, scraping the bowl as needed for even creaming.
Add the large egg and 1/2 teaspoon vanilla extract, mixing until the mixture is glossy and well combined.
Whisk together flour, baking powder, and salt in a separate bowl to distribute the leavening and salt evenly.
Gradually add the dry ingredients to the wet until just combined, avoiding overmixing. Dough should be soft and slightly sticky.
Scoop tablespoon-sized portions onto prepared sheets, press a shallow indentation in each, and spoon 1/2 to 3/4 teaspoon cherry pie filling into each indentation.
Bake for 12 to 15 minutes until edges are lightly golden. Watch the first batch for oven variability and rotate sheets if needed.
Cool on the baking sheet for a few minutes, then transfer to a wire rack. Whisk powdered sugar, milk, and vanilla to a drizzling consistency and glaze cooled cookies.
Last Step: Please leave a rating and comment letting us know how you liked this recipe! This helps our business to thrive and continue providing free, high-quality recipes for you.
Leave a comment & rating below or tag
@silksavor on social media!

Tender baked salmon crowned with a garlicky Parmesan herb crust, bright lemon, and buttery crunch. Simple to make, stunning to serve, and irresistibly flavorful.

Buttery graham crust, silky cheesecake, and cinnamon-kissed apples under a crunchy crumb, finished with glossy caramel. A fall crowd-pleaser you will crave.

Tender green beans in silky mushroom cream, crowned with crispy onions. A comforting holiday side made entirely from scratch that always disappears fast.
Leave a comment & rating below or tag @silksavor on social media!
Enjoyed this recipe? Share it with friends and family, and don't forget to leave a review!
This recipe looks amazing! Can't wait to try it.
Comments are stored locally in your browser. Server comments are displayed alongside your local comments.

Join to receive our email series which contains a round-up of some of our quick and easy family favorite recipes.
