
The Best Cocoa Fudge Brownies

Skip the boxed mix and make thick, chewy, ultra-fudgy cocoa brownies with a shiny cracked top — simple ingredients, big chocolate flavor, and reliable results every time.
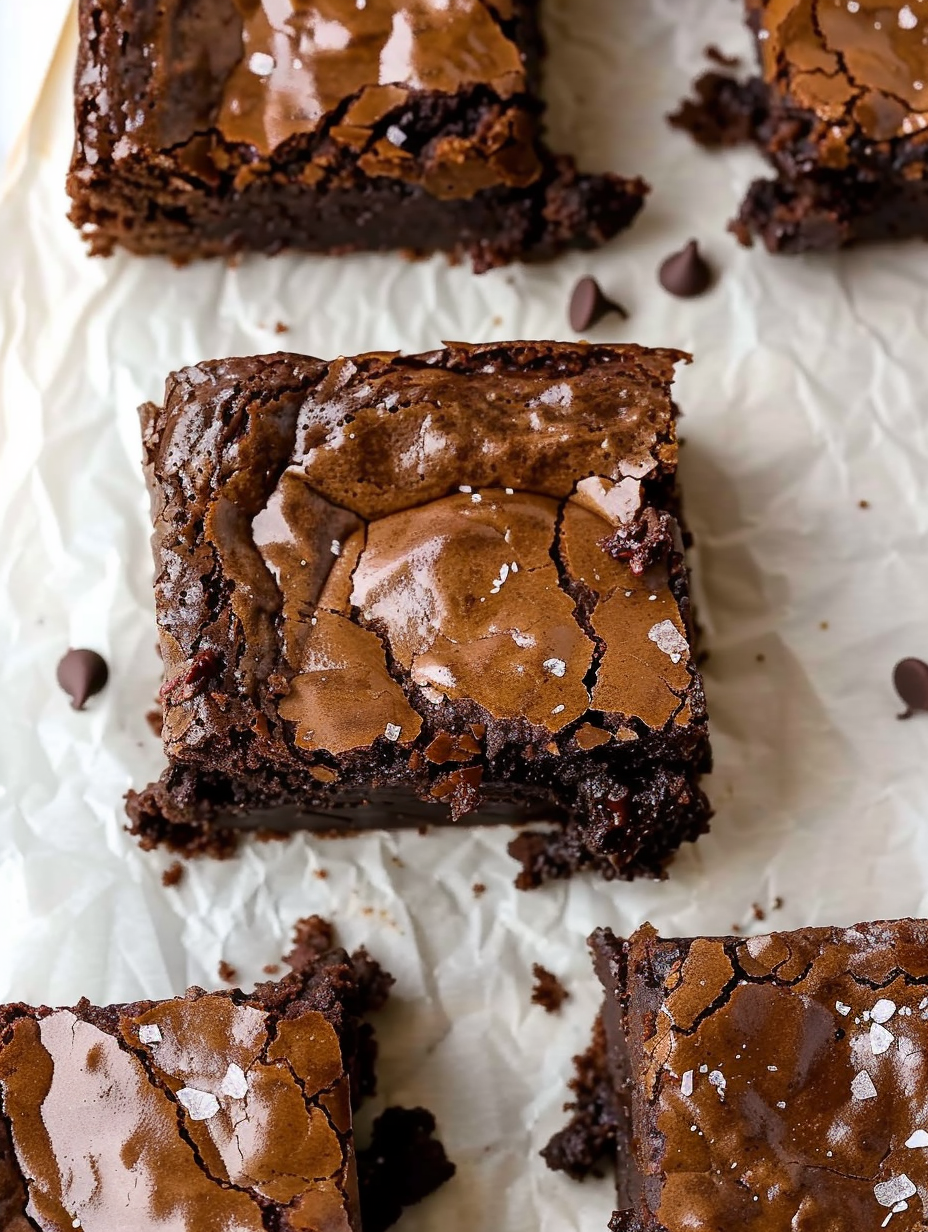
This pan of cocoa fudge brownies has been my go-to when I want something rich, deeply chocolatey, and reliably indulgent. I first discovered this method during a weekend of baking experiments when I wanted brownies that were thick and fudgy without relying on melted chocolate — just cocoa for that intense flavor and a handful of pantry staples. The result is always the same: a shiny, slightly cracked top, a chewy interior with just the right density, and a bite that feels almost like chocolate fudge. Family, friends, and neighbors often ask for the recipe when they taste these, and I love how forgiving the method is when you follow a few key steps.
What makes these special is the technique: warming butter with a touch of neutral oil, tempering warm fat into the eggs slowly, and mixing just until the last trace of dry ingredients disappears. Those small choices — a small splash of oil for tenderness, an extra yolk for richness, and optional espresso to elevate the cocoa — are what turn a simple batter into an unforgettable tray of brownies. I usually bake these in a 9x9-inch pan and let them cool completely before slicing so the center sets into that perfect fudgy texture you want. Serve warm with a scoop of vanilla or cooled and packed into a lunchbox — either way they disappear fast.
Why You'll Love This Recipe
- Deep cocoa flavor without melted chocolate: uses unsweetened cocoa powder for an intense, pure chocolate taste that shines through every bite.
- Quick to make: active prep is about 10 minutes and bake time is roughly 28 to 30 minutes, so you can have brownies from start to finish in under an hour of hands-on time.
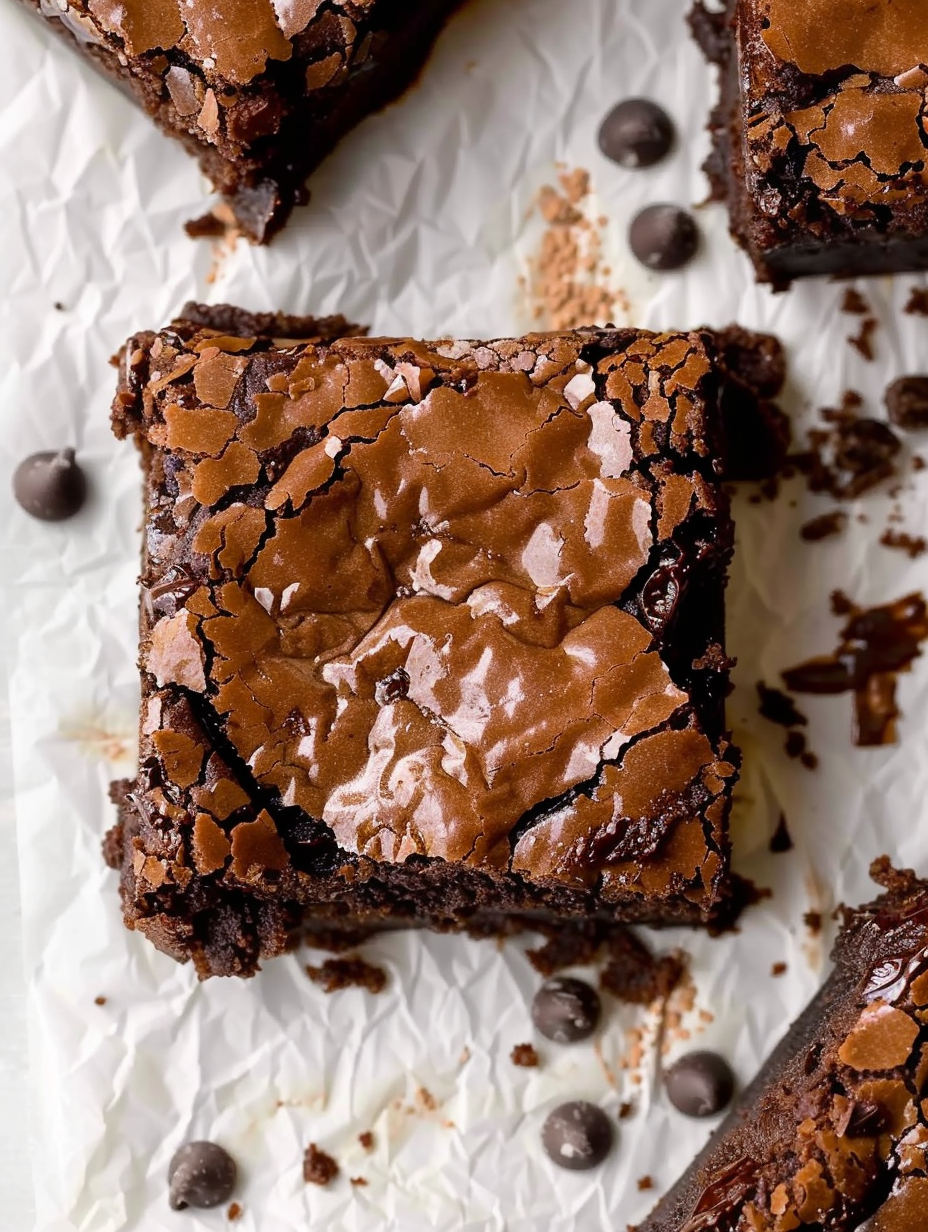
- Fudgy, not cakey: the warm-butter-tempering step and minimal stirring produce a dense, chewy interior with a glossy, cracked top.
- Pantry-friendly ingredients: all-purpose flour, cocoa, butter, eggs, and sugar — no specialty chocolate required, and espresso powder is optional.
- Easy to adapt: swap oils or omit espresso, and find clear timing cues for gooey versus more set brownies.
I've shared these with neighbors and brought them to potlucks — the response is always the same: people go back for seconds. I love that this method produces consistent results whether I'm racing the clock or baking slowly on a weekend afternoon. Every time I make them, I notice small improvements in technique that make the texture better: warm the butter gently, add the melted fat slowly to the eggs, and stop stirring the batter as soon as you see the last streak of flour.
Ingredients
- All-purpose flour (1 cup): Use a reliable brand like King Arthur or Gold Medal. Spoon and level into a measuring cup for accuracy; too much flour will dry out the brownies and make them cakey.
- Baking powder (1/2 teaspoon): A small lift helps the edges rise slightly while keeping the center dense — make sure it's fresh for best results.
- Salt (1/2 teaspoon): Balances the sweetness and enhances chocolate flavor; fine sea salt or table salt both work.
- Unsweetened cocoa powder (1/2 cup): Dutch-process or natural cocoa both work, but your flavor will shift slightly — Dutch-process is smoother, while natural can be brighter. I often use high-quality Valrhona or Hershey's for dependable results.
- Espresso powder (1 teaspoon, optional): Adds depth and amplifies chocolate notes; omit if you dislike coffee flavor.
- Unsalted butter (3/4 cup / 6 tablespoons): Use real butter for richness. If using salted butter, reduce added salt slightly.
- Neutral oil (2 tablespoons): Canola, vegetable, or melted coconut oil helps keep the center tender and extends chewiness.
- Granulated sugar (1 1/3 cups total): Divided — a portion is warmed with the butter to help dissolve sugar slightly and create that glossy top.
- Large eggs (2) plus 1 egg yolk: Extra yolk increases fat and mouthfeel so the texture is fudgier and more luxurious.
- Vanilla extract (2 teaspoons, optional): Rounds out flavor; I usually include it.
- Chocolate chips (3/4 cup): Semi-sweet or bittersweet chips fold into batter for pockets of molten chocolate.
Instructions
Prepare the pan and dry mix: Preheat the oven to 350°F. Line a 9x9-inch baking pan with parchment paper, leaving a small overhang to lift the brownies out later, and spray lightly with non-stick spray. In a large bowl, sift together the flour, baking powder, salt, cocoa powder, and espresso powder; set aside so the dry ingredients are evenly aerated and lump-free. Warm the fats and sugar: In a medium saucepan, combine the butter, oil, and one-third cup of the sugar. Heat over medium, stirring frequently, until the butter is completely melted and the mixture is uniform. Remove from heat — you want it warm but not scalding when adding to the eggs to avoid scrambling. Whisk eggs and remaining sugar: In a large bowl, whisk the two whole eggs, extra yolk, vanilla (if using), and the remaining sugar for about 30 seconds until combined. These eggs will act as a binder and give structure while contributing to fudginess when tempered correctly. Temper the eggs: Slowly pour the warm butter mixture into the egg-sugar mixture a little at a time, whisking constantly. This gradual addition raises the egg temperature gently and prevents scrambling while ensuring a glossy, emulsified batter. Fold in dry ingredients and chips: Add the dry ingredient mixture and the chocolate chips to the wet bowl. Using a rubber spatula, fold gently until the last trace of dry ingredients disappears. Stop mixing as soon as you see no streaks of flour — over mixing incorporates too much air and encourages a cakey texture. Bake: Scrape batter into the prepared pan and smooth the top with the spatula. Bake 28 to 30 minutes. For very gooey brownies, aim closer to 27 minutes; for more structure, allow 30 to 32 minutes. The edges should be firm, and the top should be shiny with a slight crackle. Cool and slice: Place the pan on a cooling rack and cool completely before slicing. Cooling lets the interior set for clean squares — if you must serve warm, use a plastic knife and cut carefully.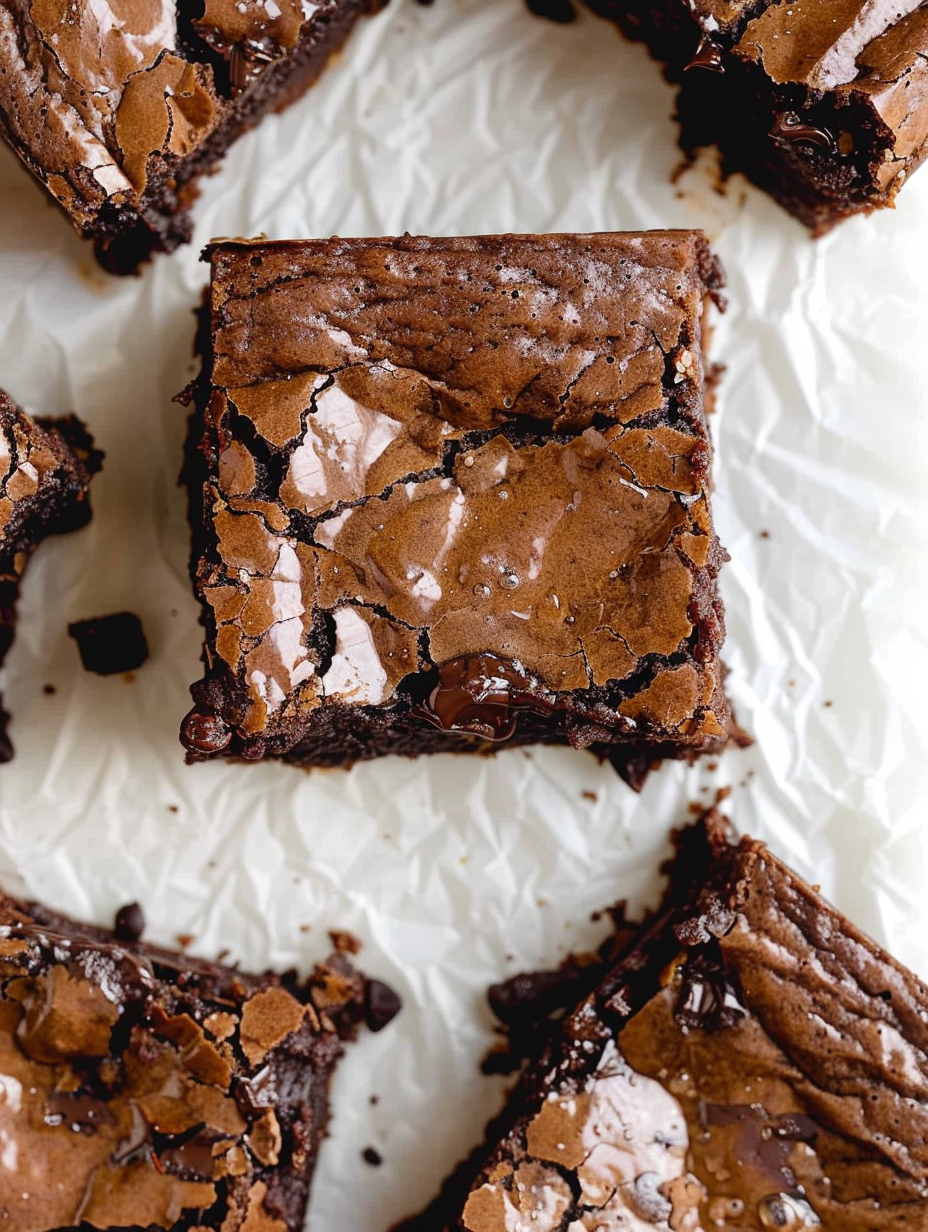
You Must Know
- Texture cues: a shiny, slightly cracked surface with firm edges and a soft center means perfect fudgy brownies; underbaking causes a wet center, overbaking yields a cakey crumb.
- Storage: store cooled brownies in an airtight container at room temperature for up to 3 days, refrigerated for up to 5 days, or frozen for up to 3 months.
- Make-ahead: bake and freeze whole pan or cut squares, then thaw at room temperature or warm briefly in a low oven to restore fudginess.
- Nutritional note: dense and rich — a small square satisfies most chocolate cravings; enjoy occasionally as an indulgent treat.
My favorite aspect is when the top cracks just right and the first slice shows that fudgy interior — it's a small victory that makes the baking process feel completely worth it. Friends often say these taste like a bakery brownie but made without the fuss of melting chocolate, and that makes me smile every time.
Storage Tips
Keep cooled brownies in an airtight container to maintain moisture. For room temperature storage, place a piece of parchment between layers and keep the container sealed; they stay great for 2 to 3 days. Refrigerate for up to 5 days if you prefer chilled squares — bring to room temperature before serving for the best texture. To freeze, cut into squares and flash-freeze on a tray for an hour, then transfer to a zip-top bag with parchment between layers; they will keep well for up to 3 months. Reheat in a low oven (275°F) or microwave in short bursts for a warm, fudgy bite.
Ingredient Substitutions
Need swaps? Use melted butter in place of the oil-only combination, but reduce to keep the balance: substitute 3/4 cup plus 1 tablespoon melted butter instead of butter and oil. For a dairy-free version, use a vegan butter and vegan chocolate chips — texture will be slightly different but still rich. For a gluten-free option, replace the all-purpose flour with a 1:1 gluten-free baking blend and check that your cocoa and baking powder are certified gluten-free. Replace granulated sugar with an equal amount of coconut sugar for a warmer flavor; the top may be less glossy.
Serving Suggestions
Serve warm with vanilla ice cream and a drizzle of salted caramel for a classic contrast. For a simple presentation, dust with powdered sugar or top with a sprinkle of flaky sea salt to highlight chocolate depth. These brownies pair beautifully with robust coffee or a glass of cold milk. For a party, cut into small squares and arrange on a platter with fresh berries and whipped cream for color and brightness.
Cultural Background
Brownies are a distinctly American treat, believed to have been invented in the late 19th or early 20th century as a portable, single-layer cake. This variation leans into cocoa powder rather than melted chocolate, a technique popularized when bakers wanted a strong chocolate flavor without tempering or melting blocks of chocolate. Over time, brownies evolved into numerous regional and family variations — some cakier, some fudgier, and many studded with nuts, chocolates, or swirl toppings.
Seasonal Adaptations
In winter, fold in chopped toasted pecans and a pinch of cinnamon for warmth. For spring and summer, top warm squares with a berry compote to add brightness. Around holidays, add orange zest and a tablespoon of Grand Marnier to the batter for a festive twist. For a decadent celebration dessert, swirl peanut butter or raspberry jam into the batter before baking.
Meal Prep Tips
Bake a pan on the weekend and portion into single-serving containers for quick treats through the week. Freeze individual squares between layers of parchment for grab-and-go snacks. If you pack them for lunches, wrap in parchment and place a small napkin to absorb any excess moisture; thaw at room temperature or microwave for 10 to 15 seconds to restore softness.
These cocoa fudge brownies are straightforward, flexible, and reliably delicious. I encourage you to experiment with the timing for your perfect gooeyness and make the recipe your own — it’s one I keep returning to whenever a chocolate craving strikes.
Pro Tips
Temper the warm butter into the eggs slowly to prevent scrambling and to create a glossy, emulsified batter.
Stop mixing as soon as the last streak of flour disappears to avoid a cakey texture.
Line the pan with parchment and leave an overhang for easy removal and tidy slicing.
Use a timer and start checking at the earlier end of the bake range for your preferred fudginess.
This nourishing the best cocoa fudge brownies recipe is sure to be a staple in your kitchen. Enjoy every moist, high protein slice — it is perfect for breakfast or as a wholesome snack any time.
FAQs about Recipes
How do I get gooey brownies?
For very gooey brownies, bake about 27 minutes; for more set brownies, bake 30 to 32 minutes. The edges should be firm and the top shiny with slight cracks.
Can I slice the brownies while warm?
Let the pan cool completely so the center can set; for quick slices, use a plastic knife to reduce sticking.
Tags
The Best Cocoa Fudge Brownies
This The Best Cocoa Fudge Brownies recipe makes perfectly juicy, tender, and flavorful steak every time! Serve with potatoes and a side salad for an unforgettable dinner in under 30 minutes.
Instructions
Prepare pan and dry mix
Preheat oven to 350°F. Line a 9x9-inch pan with parchment and spray lightly. Sift together flour, baking powder, salt, cocoa, and espresso powder; set aside.
Warm fats and sugar
In a medium saucepan, combine butter, oil, and 1/3 cup sugar. Heat over medium, stirring until butter melts. Remove from heat and cool slightly.
Whisk eggs and remaining sugar
In a large bowl, whisk 2 whole eggs, 1 egg yolk, vanilla, and remaining sugar until combined, about 30 seconds.
Temper and combine
Slowly pour warm butter mixture into the eggs a little at a time while whisking constantly to prevent scrambling and emulsify the batter.
Fold in dry ingredients and chips
Add dry ingredients and chocolate chips; fold with a spatula until the last trace of flour disappears. Do not over mix.
Bake and cool
Scrape batter into pan, smooth top, and bake 28 to 30 minutes. Cool completely on a rack before slicing for clean squares.
Last Step: Please leave a rating and comment letting us know how you liked this recipe! This helps our business to thrive and continue providing free, high-quality recipes for you.
Nutrition
Did You Make This?
Leave a comment & rating below or tag
@silksavor on social media!
Categories:
You might also like...

Parmesan Herb Crusted Salmon
Tender baked salmon crowned with a garlicky Parmesan herb crust, bright lemon, and buttery crunch. Simple to make, stunning to serve, and irresistibly flavorful.

Caramel Apple Cheesecake Bars
Buttery graham crust, silky cheesecake, and cinnamon-kissed apples under a crunchy crumb, finished with glossy caramel. A fall crowd-pleaser you will crave.

Homemade Green Bean Casserole
Tender green beans in silky mushroom cream, crowned with crispy onions. A comforting holiday side made entirely from scratch that always disappears fast.
Did You Make This?
Leave a comment & rating below or tag @silksavor on social media!
Rate This Recipe
Share This Recipe
Enjoyed this recipe? Share it with friends and family, and don't forget to leave a review!
Comments (1)
This recipe looks amazing! Can't wait to try it.
Comments are stored locally in your browser. Server comments are displayed alongside your local comments.

Hi, I'm Julia!
What's Popular

30-Minute Meals!
Join to receive our email series which contains a round-up of some of our quick and easy family favorite recipes.